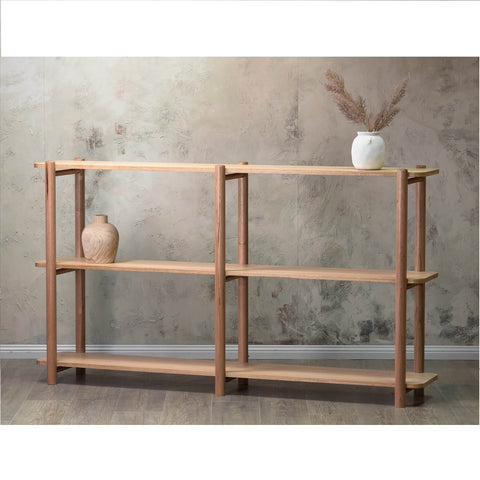
A bookcase is more than just a piece of furniture; it's a canvas for self-expression and a means to organize your literary treasures. But what if you're seeking a low-profile option that seamlessly integrates with your space while exuding timeless charm? Building a low bookcase might be the perfect solution.
In this article, we'll take you through the rewarding journey of creating your very own low bookcase, combining functionality, creativity, and craftsmanship.

Step 1: Gather Your Materials and Tools
Before you embark on your DIY adventure, gather the necessary materials and tools. You'll need:
-
Wooden Boards:
-
Measuring Tools:
-
Saw:
-
Wood Glue:
-
Clamps:
-
Screws or Nails:
-
Sandpaper:
-
Paint or Stain:
Step 2: Design and Measurements
Determine the dimensions of your low bookcase. Measure the height, width, and depth you desire. Consider the space where the bookcase will be placed to ensure a seamless fit. Sketch a rough design to visualize the structure and number of shelves.
Step 3: Cutting the Wood
Using your measurements, carefully cut the wooden boards for the sides, shelves, and back of the bookcase. If you're using a circular saw or miter saw, ensure that your cuts are precise and straight.
Step 4: Assembly
Assemble the bookcase's frame. Apply wood glue to the edges of the side pieces and attach them to the top and bottom shelves. Use clamps to hold the pieces together while the glue sets. Once the glue is dry, reinforce the joints with screws or nails for added stability.
Step 5: Adding Shelves
Position the remaining shelves inside the frame, ensuring they are level and evenly spaced. Secure them using a combination of glue and screws or nails.
Step 6: Finishing Touches
Sand the surfaces of the bookcase to remove any rough edges or splinters. This step is crucial for achieving a polished final look. After sanding, wipe away any dust.
Step 7: Finishing Options
Choose a finish that suits your aesthetic. You can paint the bookcase in a color that complements your decor or apply a wood stain to showcase the natural grain. Seal the finish with a clear coat for added protection and durability.
Step 8: Placement and Enjoyment
Once your low bookcase is complete, find the perfect spot for it in your home. Whether in the living room, bedroom, or study, your handmade creation will not only hold your books but also be a testament to your creativity and craftsmanship.
Crafting Memories and Functionality
Building a low bookcase like this is a fulfilling endeavor that blends functionality with artistic expression. From choosing the materials to assembling the pieces and applying the finish, each step contributes to a sense of accomplishment.
As you place your handmade bookcase in its designated space, you're not only enhancing your interior design but also weaving memories and stories into every plank. Embrace the journey, and revel in the joy of crafting a piece of furniture that reflects your unique style and adds character to your living spaces.


